
DIY Wool Dryer Balls

On this farm, we raise sheep.
You'd never know from my blogs that we raise sheep, would you? I write about farming and such and occasionally show pictures of our sheep. I do talk about farming chores but I haven't spoken of wool, our wool specifically, the many attributes of wool in general, or the many fun and useful things you can do with it.
I think I'm way over due for a blog about wool, don't you?
I have pondered and pondered the topic of wool. Where to begin? I've thought about the many phases and facts regarding wool. I get so overwhelmed with the possibilities for a blog that I put the idea away thinking I'll get back to it another day. I read a post about knitting from a friend over on Google+ , Lynne Knowlton. As Lynne described getting out those knitting needles again I was quickly reminded it's the very basic stuff that folks would enjoy.
It hit me, yes, let's make wool dryer balls!
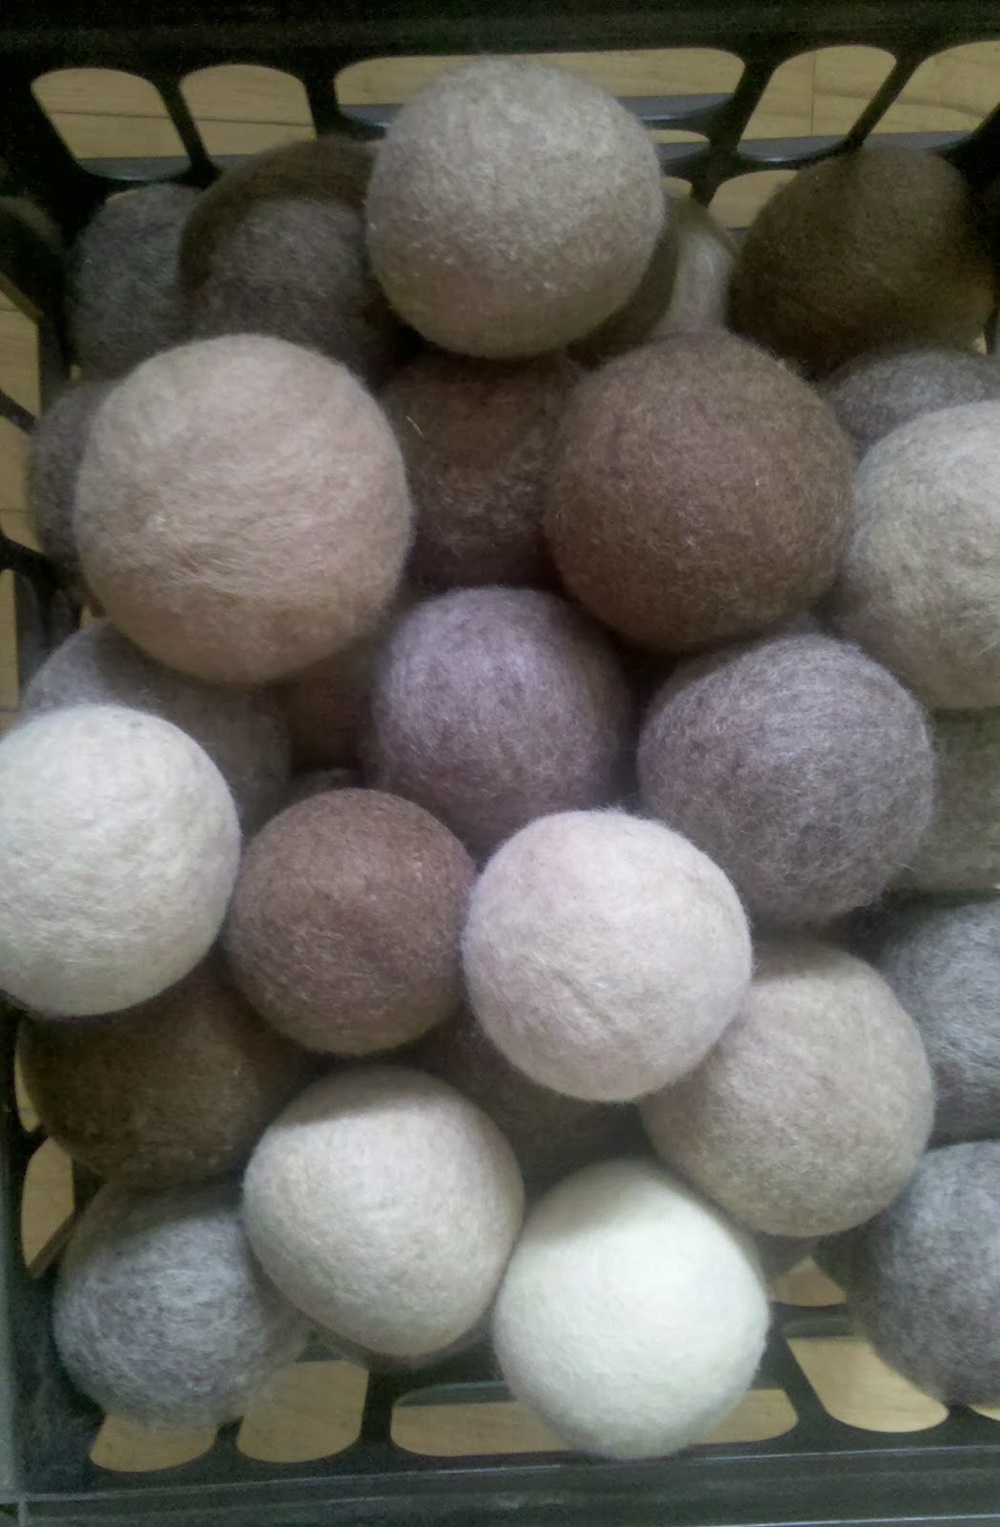 |
| Stoney Mountain Farm Wool Dryer Balls |
What the heck are wool dryer balls you ask?
Well they're just the coolest laundry alternative out there, of course and I am biased!
wool dryer balls:
....replacing those chemical laden dryer sheets, one household at a time ... we should all be happy about that.
If your not inclined to use them as a laundry alternative they make great pet toys, juggling balls, pin cushions, and even the base for more felting projects. I even have one customer that adorns her home with bowls of these natural felted balls of wool, quite nicely too.
So, take this project as a crafty one...that is the intent after all!
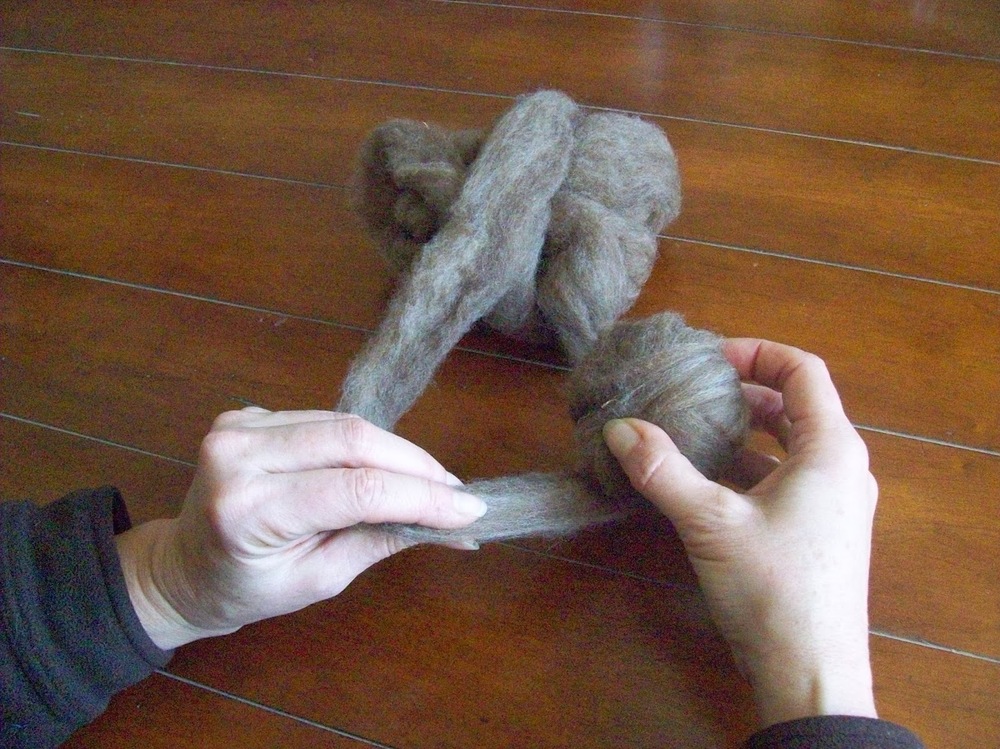
 |
| Grey wool roving |
I am going to show you how to make them...the best way! There are alot of folks making them out of yarn and that's fine but they won't last as long. We're going to make them from wool roving. Roving is the wool, after it has been washed and carded. Roving is the stage just prior to spinning the carded wool into yarn.
Maybe you have a stash of yarn on hand you'd like to use? Whether yarn or roving, the process we are about to engage in is felting.
For this project all you will need is:
- wool, I would suggest 2 ounces of roving for each ball, totaling 6 ounces. I would also suggest you make 3 wool dryer balls as the desired affects from the wool balls require a minimum of 3. You can purchase roving from a variety of craft stores, our farm, our shop on Etsy or many others, and many other places. I would encourage you to buy it from a farmer or someone that knows the source of the wool and how it is handled.. Like food, wool is being treated in ways you would find criminal...at least I hope you would. Do you know 80% of the wool grown in this country is being sent to China for processing because the chemical restrictions are lighter there? The wool then returns to you, the unsuspecting buyer. On our farm we only send our wool to U.S. mills that do not use chemicals in any stage of the process...that's hard to find. If you want colorful wool dryer balls you can find roving that has been dyed. We don't use any chemicals or dyes on our wool...just au naturale, only the shades of the sheep.
- a sock, either mens cotton tube sock or a womens trouser sock will work
- rubber bands
- washer& dryer
- laundry soap
Lets Begin:
First, divide your roving into 2 ounce sections. Don't be afraid to pull the roving apart. We are going to roll each 2 ounce portion of roving into a ball. If you are using yarn, the process is the same. If your roving tears, do not fret, just pick up the next piece and keep going.

As you roll the roving be careful to always keep a round shape. If your "ball" gets lopsided you need to focus on the underdeveloped side. You want the ball to be taut but not tight. Do not be afraid. Regardless, you will have a felted ball at the end of this process.


You will want to feed the end back through your final pass. If you are familiar with needle felting this is where you would felt the end down therefore leaving a smoother edge.

Now, your ball is ready to place in the sock. Sometimes I put my hand in the sock first and grab the wool ball with my sock covered hand, then pulling the sock over the ball. Tie off the sock with a knot or the rubber band, Repeat the process until your sock is full with the 3 balls.

Now, place the sock in the washing machine in a hot soapy cycle. Remove the sock from the washer and run them through a dry cycle.
Remove them from the sock.
Voila!
your very own wool balls....
So easy!
You'll be so impressed with the ease and quality of your results, you may just become a wool junkie!
Ready to try some felting?