
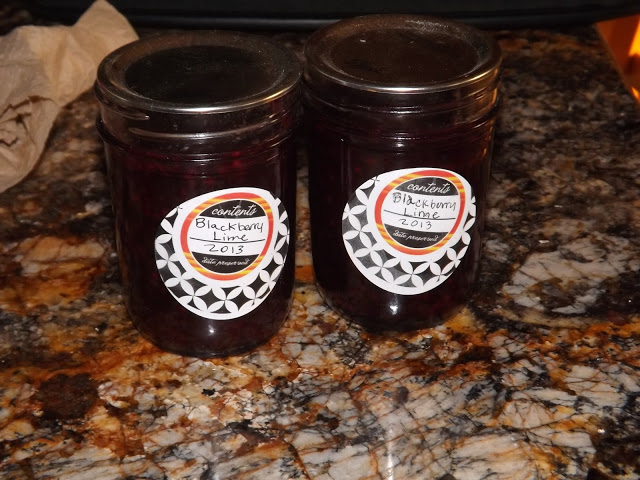
Blackberry Lime Jam
I have ventured into a creative space with my jams this year. I think I've overcome the fears around preserving and I'm feeling a bit brave. Preserving is such a wonderful way to share gifts that keep on giving. It is a feeling like no other when you open a jar of something you made months, the previous year, or even years before and taste all the love you put into it. The preserves get stored on a shelf waiting for the next PB&J or fluffy buttermilk biscuit slathered with butter. The memory of what, how, where and when get stored away with them. Then one day you walk into the pantry and pull out a jar. POP goes the lid and all those luscious fruits and memories are there for the spreading.
So the first "creative flavor combo" for me this year, Blackberry and Lime. I can't take credit for the idea. I knew I had a bunch of blackberries and I wanted something a bit different so I 'Googled' . Last year I tried a Blackberry Peach recipe. That didn't get it. The blackberries just over powered the peaches. I've also tried a triple berry and it was good but I wanted something unusual. The addition of the lime adds a brightness. You can barely detect it until you read the label and then you exclaim, "I knew I tasted something a bit different. I think this is a keeper. See what you think
The jam recipe is ever so basic folks. All I do is measure 2 pounds of fruit and place it in a non metal bowl with 4-8 ounces of sugar. The amount of sugar depends on the sweetness of the fruit and your taste buds. Then, finely grate the rind of 1-2 limes. Stir well. Cover the fruit, sugar and lime peel and place it in the fridge for at least 24 hours. If your schedule gets hectic I've left it there for 3 days. Yikes you say, but it was fine. I adore this recipe for this reason. So often my days plans get interrupted by something going on around the farm. I have to be flexible and this recipe flex's with me. Actually this year the blackberries didn't seem to break down at all in 24 hours. That's what you want, the sugar and the fruit to macerate, or break down together.
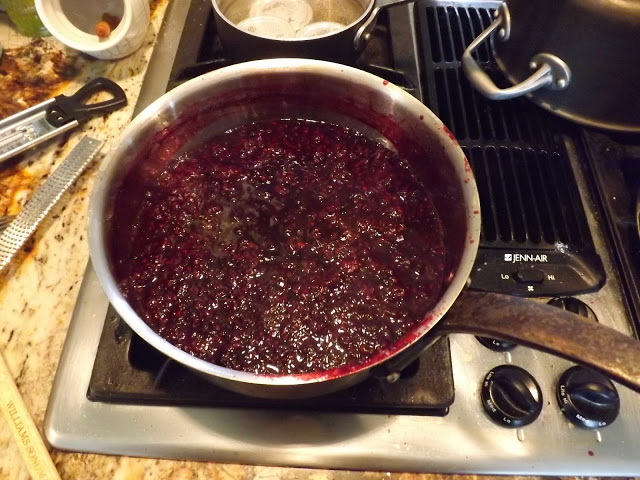
OK. Your 2 do list is letting up a bit and you can see your way clear to get into the kitchen and finish your preserves. Place the fruit in a non reactive pot and bring it to a simmer. Simmer, simmer until....

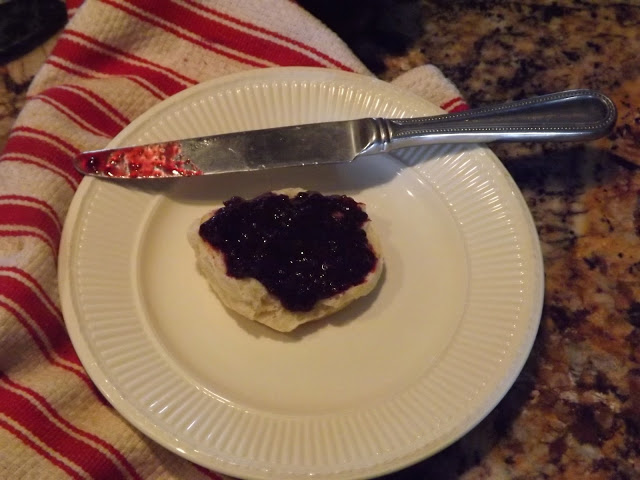
Place some of your jam on the plate. If a line drawn with your finger doesn't bleed, your good to go! Now it's time to can that JAM!
I won't spend time of the basics of canning on this blog. Ball is an excellent site and has resources galore. Basically fill your processed jars and process the jam in a water bath for 10 minutes but the Ball site will answer all your questions.
I use this basic recipe for everything now. The only thing I might change in the process is adding 1 Tablespoon of lemon juice to the macerating fruit if I want the flavor or so the fruit doesn't discolor. When the fruit begins to thicken I add my flavors. While surfing about the web I found a fabulous chart on Northwest Edible Life
blog that I will use as my guide but once you get the basics the SKY'S THE LIMIT.