Is the boss the farmer or the sheep?

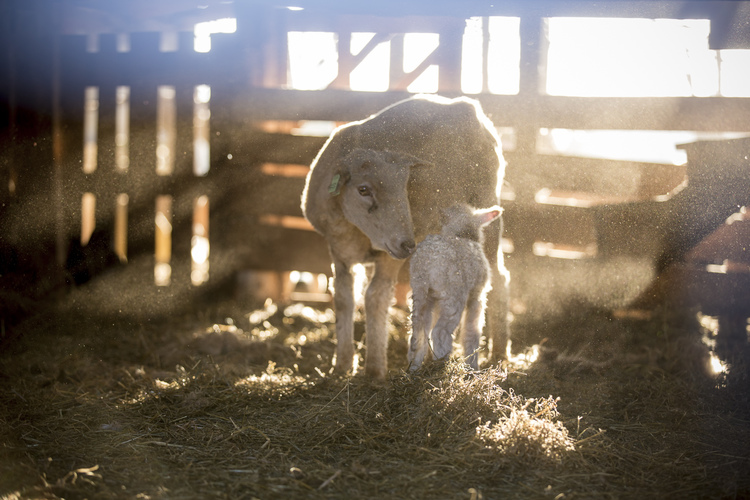
Farm animals are portrayed to most people through children's books. We all have an image of what they each should look like, usually cute and huggable right? You'd be surprised how many folks know what a lamb is but don't know what a sheep is. Many don't have a clue that a lamb is a baby sheep.
There is a lot about sheep folks don't know. For one, did you know there are over 200 different breeds of sheep worldwide. The difference can be dramatic. Some sheep have wool, some don't. Some sheep have horns, some don't. Some sheep have no horns, some have 2 horns, some have 4.
Wild looking you say?
This is a perfect example of the 4 horned genetics in the breed we raise, the
. The 4 horn genetics are not unique to the Navajo Churro. There are other breeds that carry the gene.
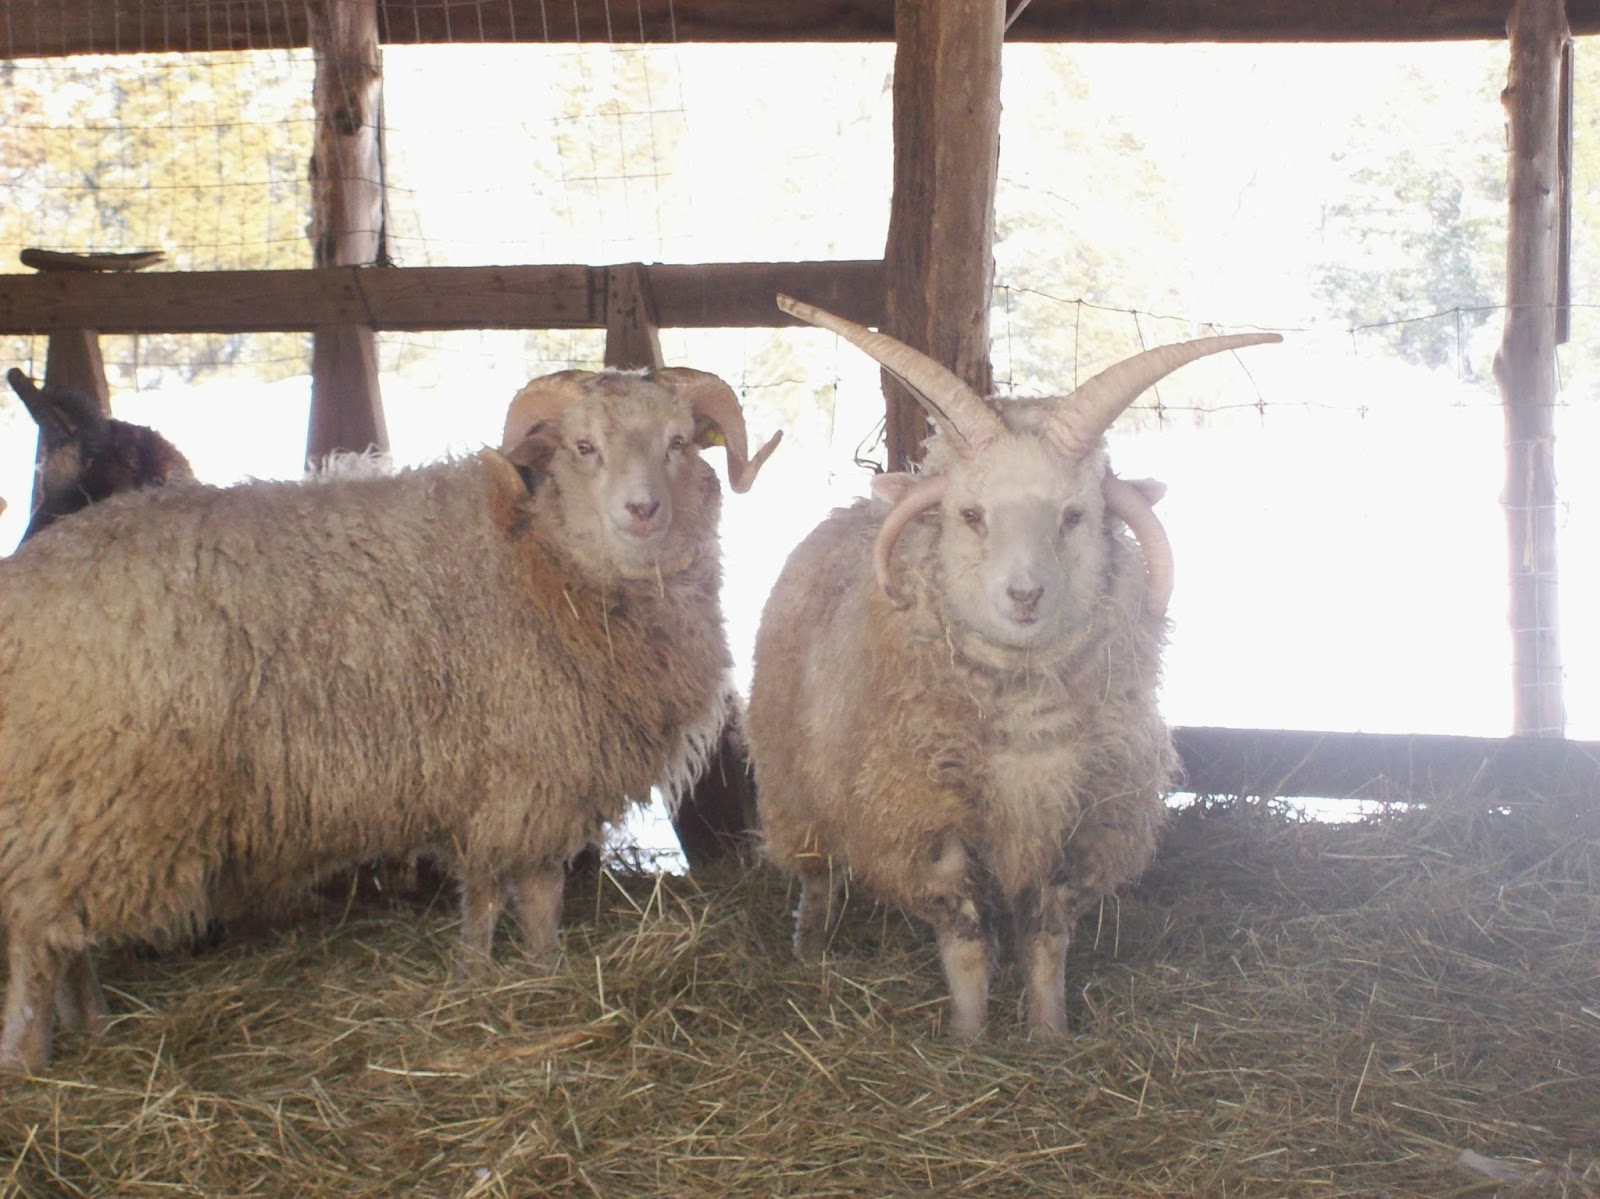
What has fascinated us about these sheep with 4 horns is watching their personality develop.
They must navigate their way a bit differently.
They are different then the other sheep.
It's almost as if as wee ones they have a special crown on their heads and they know not why. Eventually they grow into them and understand and respect them.
The horns are so dramatic and cannot be ignored by you or the other sheep.
We've concluded by observing these guys early on in their life,
...they learn to own these horns.
I wonder, is there a message from mother nature?
It has been said, it's our very differences that make us stronger.
As we prepare for our new lamb crop this year we feel sure we will
welcome
at least one ram lamb with four horns.
As a final note of interest
I read somewhere that the Navajo culture prized the multi-horn sheep as a spiritual gift, while the South American cultures believed them to be a "devil" spirit and eliminated them from a flock.
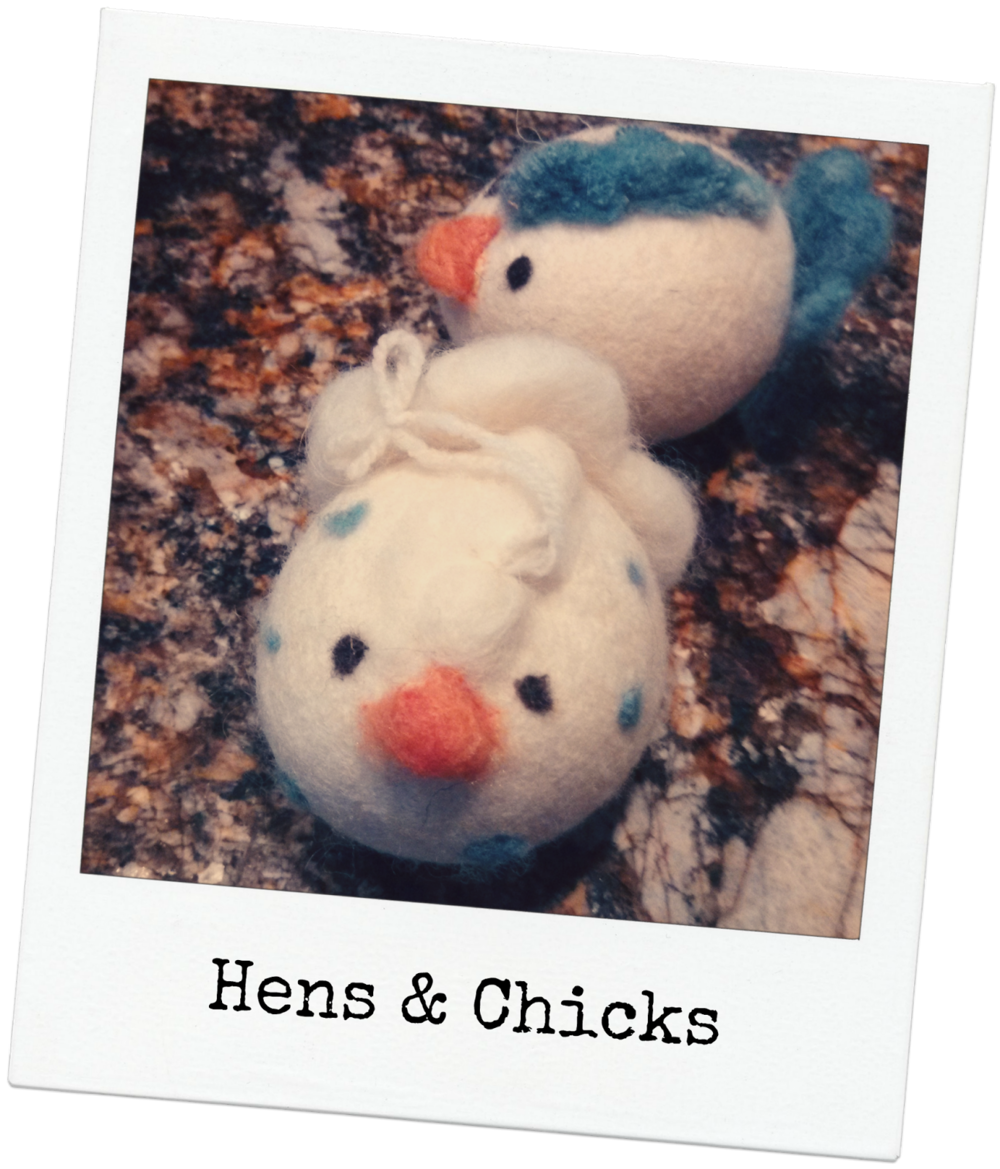
Felted Chicks

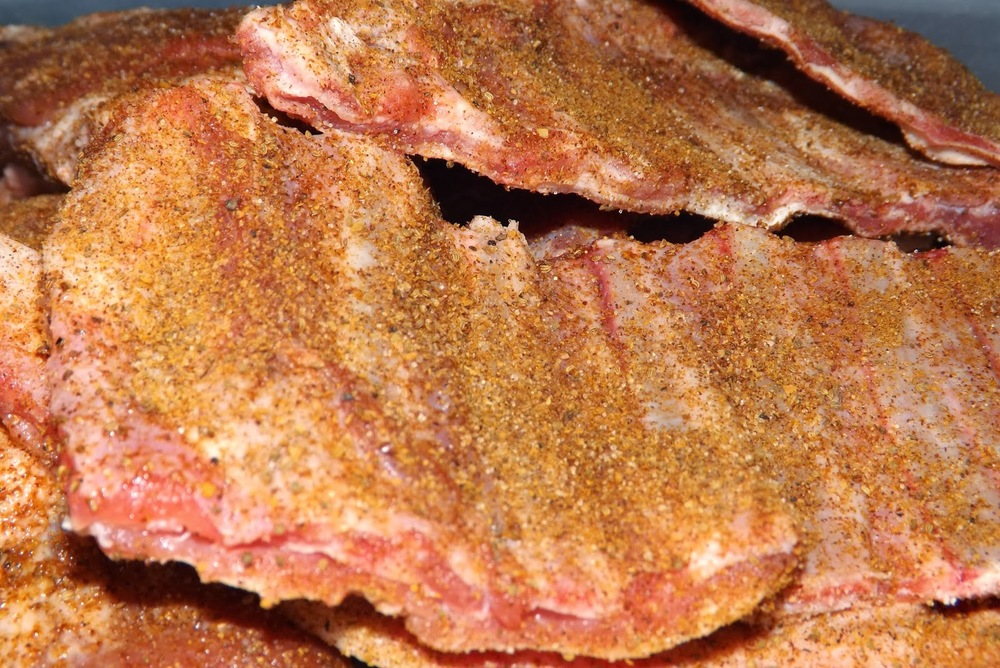
Lamb Ribs

ingredients: lamb ribs, spice rub, BBQ sauce

Remove from oven.
Do you see the GOOEY?
Voila!
Too easy?
DIY Wool Dryer Balls

You'd never know from my blogs that we raise sheep, would you? I write about farming and such and occasionally show pictures of our sheep. I do talk about farming chores but I haven't spoken of wool, our wool specifically, the many attributes of wool in general, or the many fun and useful things you can do with it.
I think I'm way over due for a blog about wool, don't you?
I have pondered and pondered the topic of wool. Where to begin? I've thought about the many phases and facts regarding wool. I get so overwhelmed with the possibilities for a blog that I put the idea away thinking I'll get back to it another day. I read a post about knitting from a friend over on Google+ , Lynne Knowlton. As Lynne described getting out those knitting needles again I was quickly reminded it's the very basic stuff that folks would enjoy.
It hit me, yes, let's make wool dryer balls!
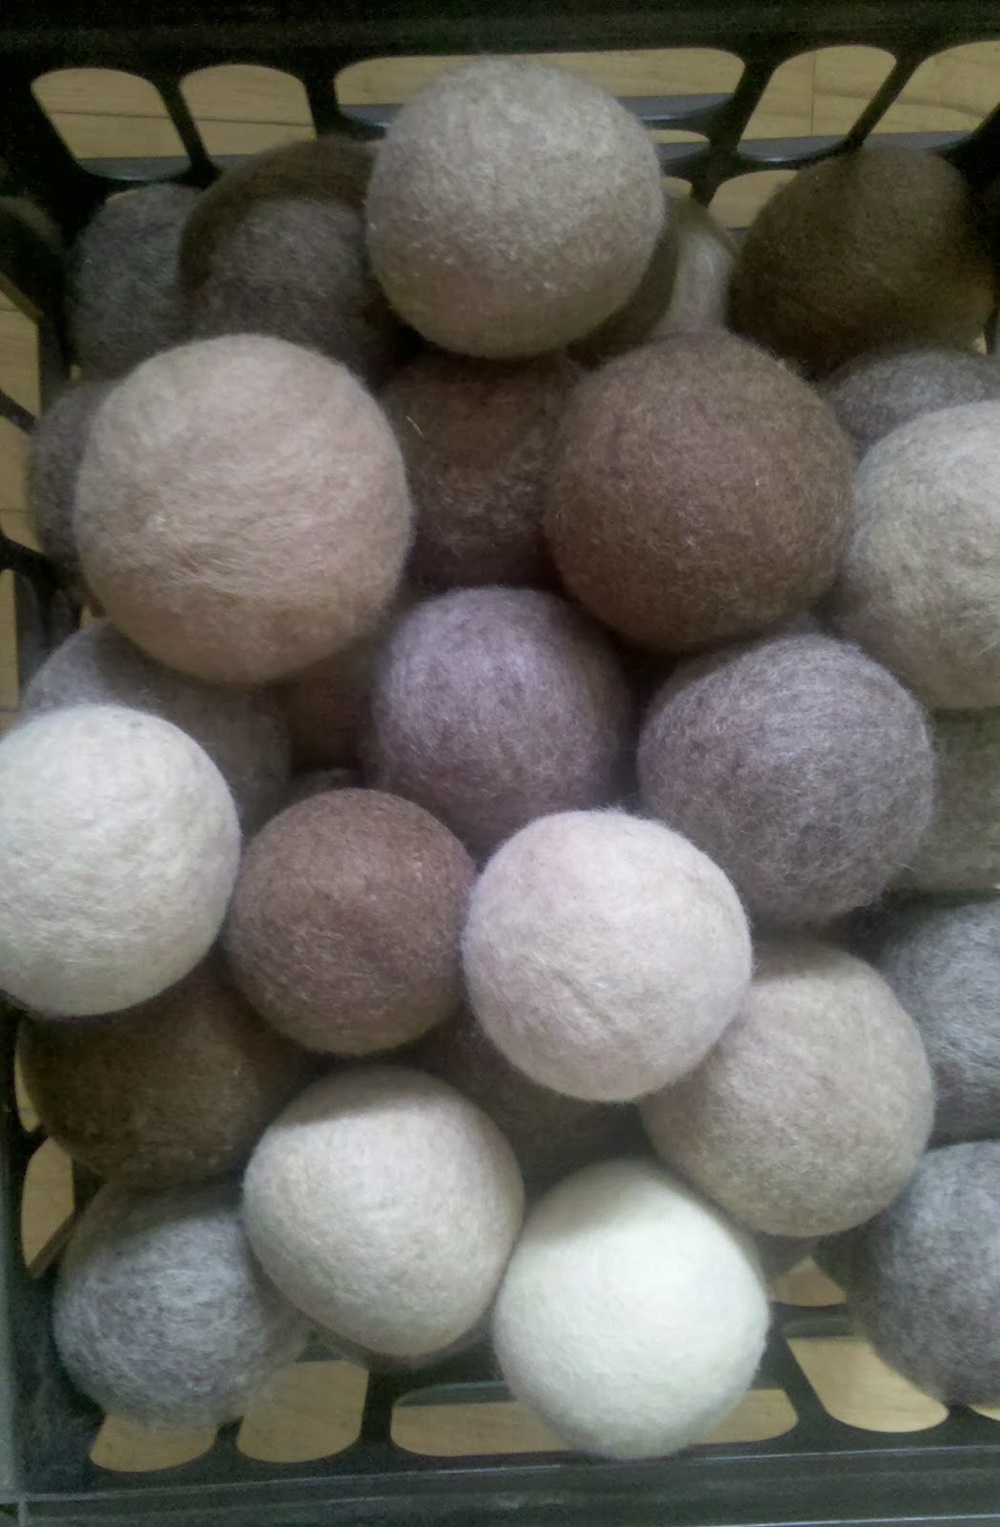 |
| Stoney Mountain Farm Wool Dryer Balls |
What the heck are wool dryer balls you ask?
Well they're just the coolest laundry alternative out there, of course and I am biased!
If your not inclined to use them as a laundry alternative they make great pet toys, juggling balls, pin cushions, and even the base for more felting projects. I even have one customer that adorns her home with bowls of these natural felted balls of wool, quite nicely too.
So, take this project as a crafty one...that is the intent after all!
 |
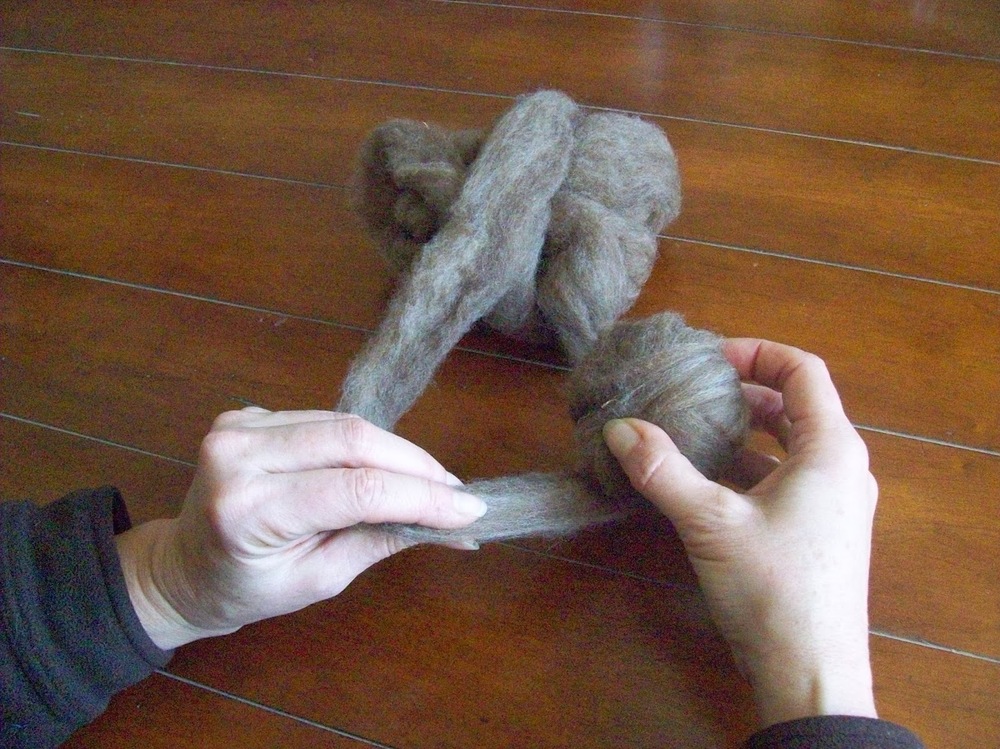
| Grey wool roving |
I am going to show you how to make them...the best way! There are alot of folks making them out of yarn and that's fine but they won't last as long. We're going to make them from wool roving. Roving is the wool, after it has been washed and carded. Roving is the stage just prior to spinning the carded wool into yarn.
Maybe you have a stash of yarn on hand you'd like to use? Whether yarn or roving, the process we are about to engage in is felting.
For this project all you will need is:
- wool, I would suggest 2 ounces of roving for each ball, totaling 6 ounces. I would also suggest you make 3 wool dryer balls as the desired affects from the wool balls require a minimum of 3. You can purchase roving from a variety of craft stores, our farm, our shop on Etsy or many others, and many other places. I would encourage you to buy it from a farmer or someone that knows the source of the wool and how it is handled.. Like food, wool is being treated in ways you would find criminal...at least I hope you would. Do you know 80% of the wool grown in this country is being sent to China for processing because the chemical restrictions are lighter there? The wool then returns to you, the unsuspecting buyer. On our farm we only send our wool to U.S. mills that do not use chemicals in any stage of the process...that's hard to find. If you want colorful wool dryer balls you can find roving that has been dyed. We don't use any chemicals or dyes on our wool...just au naturale, only the shades of the sheep.
- a sock, either mens cotton tube sock or a womens trouser sock will work
- rubber bands
- washer& dryer
- laundry soap


Let the New Year Begin

So, if you are feeling the emotional pull of the holiday past and have no outlet worthy of your drama, just think forward to the year ahead...that's what I did.
What are New Years resolutions all about anyway? A new year, new start? Organization? Planning? Goals? I imagine all the above would be considered sound reasoning.
According to Wikipedia a 2007 a study about new years resolutions involving 3,000 people showed that 88% of those who set New Year resolutions fail, despite the fact that 52% of the study's participants were confident of success at the beginning. Men achieved their goal 22% more often when they engaged in goal setting, (a system where small measurable goals are being set; such as, a pound a week, instead of saying "lose weight"), while women succeeded 10% more when they made their goals public and got support from their friends.
I have always been a big new years resolution gal. I haven't had much success with them but each and every year I proclaim a few more. I proclaim I will clean more, eat less, work harder, exercise more, be more grateful...it's a wonder I have time for everyday living. Truth is, as the year moves forward, everyday living kicks in and all those grandiose plans are forgotten...at least until the next new year.
We set out each year planning for our farm too. We have the same goal setting approach but try to be a bit less casual about the results, it is our livelihood after all. In the business environment it's referred to as forecasting.
Forecasting is the process of making statements about events whose actual
outcomes (typically) have not yet been observed....wikipedia
Sounds like "resolutions" to me
In 2014 we plan to grow our flock. Calling it resolutions or forecasting matters not, our motivations are the same. We established a goal, based on previous results. We simply recognized that demand exceeds supply. We did some forecasting and set a goal. Our goal was achievable because our farm, our acreage to be exact, can support more sheep.

At the core of our mission, always, is to raise healthy happy animals and that means providing the proper conditions. Plain and simple, there needs to be enough good quality grass for the number of sheep.
Our goal:doable!
Truth is each year on the farm we make lots of plans. We plan not to have any noxious weeds in our pasture, each year we do. Each year we plan not to loose sheep, each year we do.
Each year I am made very aware that we are not in control here. Each year I am reminded, no matter our desired outcome, mother nature will preside over the results.
Whether in our personal lives or our businesses, we set each new year in motion hoping to create some modem of control, yet it is not to be....

DIY Heat

This past fall we began gathering wood for our winters heat. On one particularly beautiful fall day my husband and I headed out to gather the split wood from trees he had already dropped for one reason or another.
 |
| Immature Sweet Gum seed pod |
We choose trees that are nuisance trees like sweet gums. I hate to call any tree a nuisance but sweet gums drop seed pods that get in our sheep's wool and create major havoc. We choose trees that might have been hit by lightening, or others that if we don't take them down they're coming down on their own. An amazing tid bit of information I've learned through my recent wood burning experience is that each tree variety produces a different quality of heat.
 |
| My right hand is on the gas lever |
We have a great system working together. My husband John uses the chain saw and cuts the logs. I place each log into the wood splitter. The gas powered splitter feeds the log into a steel wedge that splits the log. Each log gets split in two, then each 1/2 gets split in 1/2 again. So, each log is basically split into 4.
Shall we say it is then, a "pretty log"?


WHOLEsome Food: EGGS

The post got my attention but so did the comments from folks still talking about the price of eggs. I hear folks gripe a lot about the price of farm fresh eggs.
No question, farm fresh food can be pricey in comparison to the big box stores. We're so conditioned to the prices established by the industrial size farms, when we're faced with the prices associated with the small, local growers offering the most healthful alternatives we often feel a bit of sticker shock.
Many folks realize the choice they're making but for those that want to be a bit enlightened I thought it was time to share a bit of chicken and egg farming reality...
Yes, you can buy a dozen factory eggs from chickens lucky to see the light of day. You can always be assured your eggs come from tightly confined hens dropping their eggs on a conveyor belt. And yes, you can get those for around $1.99 or sometimes less!
Pastured, free range chicken eggs run $4-$5 in our neck of the woods. Organic are even higher I'm not going to engage the "organic" discussion here, that might be a future Blog.
Let me show you what you get for that extra $1.50.
 |
Look at the difference in nutrients! |
And, if nutrients don't get your attention (the foodie in me never leaves the room) have you tasted the difference in a farm fresh egg and a store bought?
 |
| Can you see the one? Now you should taste the difference! |
Cinnamon Pickles

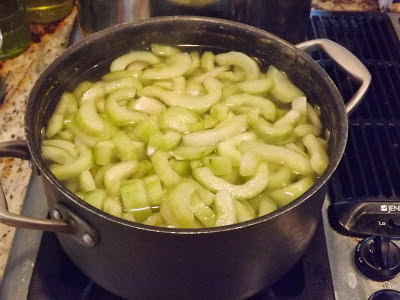
As so often was the case, an old recipe came out of need for preservation or desire not to be wasteful. This recipe is just that. You know those cucumbers that stay on the vine just a bit too long? Either hidden under all the growth, or, more likely with me...I didn't pick it in time. The seeds are way too developed for your regular pickle recipes...well, here is the answer to your "i don't want to be wasteful" woes.
I first had these pickles a few years back and fell in love with them immediately. They're very different. They're crisp and spicy like fall, not from heat but from cinnamon.
The only issue I had with the original recipe was the bright red color which came from red food coloring and red cinnamon heart candy. If you don't know, you should read up on red food coloring. An unnecessary additive I choose to stay away from so I didn't use the candy or the food coloring. The recipe also uses alum (yes, derived from aluminum) and I found some controversial information about it too. Alum has always been used in pickling to get the crispness. Although controversial, I used it anyway, this time. It is a tiny amount and I didn't want to alter the character of the pickles...Next time I will try eliminating the alum and see what happens.
The recipe is time consuming but quite easy. Know that the next few mornings (yes you read that right) you will have a few basic steps. The important thing to note is starting this today means you won't be actually canning until the 3rd day. I do love canning but I also know I have to block off the time and kitchen space and I'll bet if you've read this far into this blog you know exactly what I'm saying!
Ingredients:
2 gallons cucumber rings from too big cucs (peel, seed, slice in rings or as I've done half rings)
water
2 C pickling lime
3 C white vinegar
1 teaspoon alum
10 C Sugar
8 sticks cinnamon
1 C cinnamon hearts (if desired)
1 bottle of red food color (if desired)
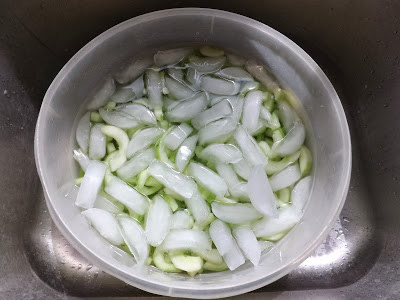
Soak the cucumber rings, lime, and 8.5 quarts of water for 24 hours. Drain and wash well. Cover with ice water and soak for 2 hours. Pour off ice water.
 Cover rings with 1 C vinegar, alum, and red food coloring if using and enough water to cover. Simmer for 2 hours.
 Once you've reached your boil your ready to can these babies! Put the rings in your hot sterilized jars, cover with liquid to 1/4 " head space. Put on your sterilized lids and water bath for 20 minutes. In 8-10 weeks your ready for the unveiling! I didn't miss the red color at all. When they were first cooking they had a marvelous celery green color I wished had lasted. The color is much more appetizing to me then the red ever was. Hope you ENJOY!
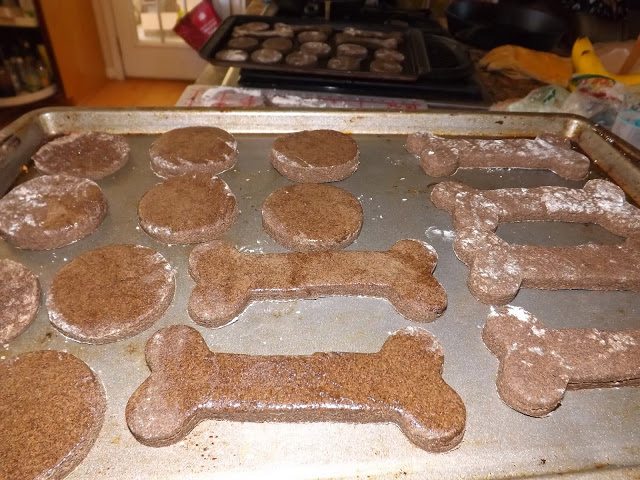
Dog Biscuits
The more I know about farming and the food we consume the more engaged I become in sourcing our ingredients. I'm a stickler about our food and those choices are the same for all the animals on our farm. I honestly don't know how it could be otherwise.
My, shall we say, enlightened perspective regarding our food has led to many of our food staples falling under the category, made from scratch.
Any of you that have experienced the shift from....
store bought:homemade in any of your food choices knows...
it is always for the better.... in so many ways.
Today, our transition from store bought is all about our four legged kids treat...
We have a ritual, as soon as our pups hear the spoon hit the side of the coffee mug, there they are. It's pretty cute, you can change everything about the moment, the setting, the cookies, the time, it wouldn't matter...the sound does it. They know, it's morning treat time!
I'm sure those of you with pets can appreciate the journey through expensive food options. I love our kids and cost just couldn't be a factor, even on our farm income. I learned to do with out pedicures some time ago. I'll find something else to do away with before I feed our kids unidentifiable food!
Meet our Pups!
 |
| Isabelle |
 |
| Earthquake (aka Quake) |
 |
| Could you resist? |
 |
| Not quite as photogenic but all personality. |

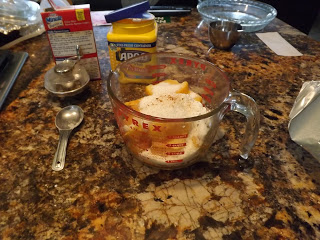
Ingredients:
1 Cup water
1 egg (farm fresh of course)
5 Cups Buckwheat Flour
1 Cup All Purpose Flour
1/3 Cup Honey (sourced locally)
1/3 Cup Molasses (sourced as locally as possible)
2 Tablespoons Cinnamon
2 Tablespoons Ground Ginger
Rendered Bacon Fat
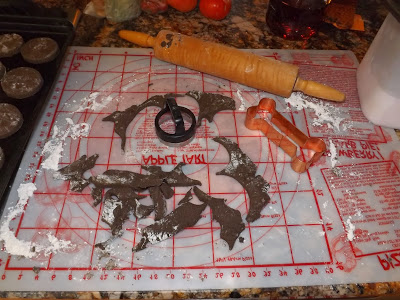
I like mine a bit thicker, 1/4″ and 1/2″ thick. I used a bone shaped cookie cutter for maximum affect.
Peaches, Peaches everywhere

So, here is the deal. I've become addicted to food preservation ideas. I love having great food available to present at that last minute when you get the word your BFF is dying to see the farm and will come for lunch tomorrow or your husbands family is on the interstate just passing by and would love to come say Hi! You know those moments. We all have them in some form.
I love to cook and serving good food is very important to me. I don't want those moments when an unexpected guest graces our home to be any different. I might not be the best at making sure the Welcome mat is swept off but rest assured, I'll serve something to remember. During the summer when fresh food is abundant and full of flavor I have plenty of opportunity to make and stash those yummy treats.
Over the last couple of years, peaches have been a star ingredient. The addiction began when the peach vendor next to me at the Durham Farmers Market would have boxes of peaches that couldn't be sold because they weren't perfect so I would gladly take them off their hands for a few dollars. I gathered some of my favorite jam recipes during that time but today I am here to share my favorite of all surprises...
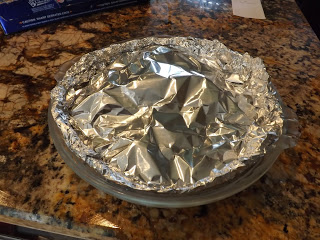
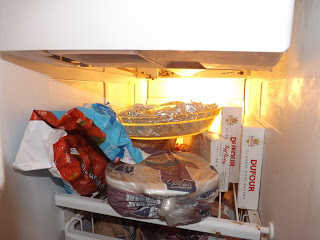
Freezer Peach Pie. The filling is oh so simple. You then fill a pie plate lined with foil full of the peach mixture. Freeze the plate with the peaches. Then, after it has had time to freeze, you remove the pie plate from the foil and Voila! You have a frozen peach pie filling ready to rest in the buttery crumb of a freshly made pie crust and baked to perfection just as if you'd freshly peeled and sliced those peach beauties!


Ingredients:
4-5 Cups Fresh Peaches (original recipe called for 2.5 cups but I say, why not more?)
2Tablespoons Cornstarch
2Tablespoons Tapioca
3/4 - 1 cup of sugar recommended but I add it based on peach sweetness (usually 1/2-3/4)
Dash of fresh Nutmeg
Cinnamon if desired. I add a touch but husband not a huge fan.
Mix it all together and place in your foil lined deep dish pie plate.
When your ready to use:
Preheat oven to 450. Place frozen peach mixture on top of your favorite crust. Top with another crust or lattice strips. Bake for 20 minutes. Lower heat to 350 and bake another 30 or until lightly browned.
Recipe adapted from a recipe found on allrecipes.com
-
January 2024
- Jan 17, 2024 Sheep fencing gone wrong… Jan 17, 2024
-
April 2023
- Apr 3, 2023 The journey to vegetarian, or not? Apr 3, 2023
-
March 2023
- Mar 20, 2023 Making sense of scents, or not... Mar 20, 2023
-
February 2023
- Feb 26, 2023 Lamb Sliders Feb 26, 2023
-
March 2022
- Mar 15, 2022 HOW TO BE THE BEST SHEPHERD: Lessons from a sheep Mar 15, 2022
-
January 2022
- Jan 17, 2022 Lamb Bone Broth /Stock Jan 17, 2022
-
April 2021
- Apr 26, 2021 Farming through Covid Apr 26, 2021
-
June 2020
- Jun 19, 2020 Turning 60 Jun 19, 2020
-
January 2020
- Jan 12, 2020 wool dryer ball transparency Jan 12, 2020
-
September 2019
- Sep 10, 2019 It's hard not to project Sep 10, 2019
-
June 2019
- Jun 21, 2019 Weaning, a whole new meaning Jun 21, 2019
- Jun 17, 2019 Strawberry Balsamic Basil Pops Jun 17, 2019
- Jun 10, 2019 Collard Salad Jun 10, 2019
-
February 2019
- Feb 28, 2019 Shearing Day was not a washout! Feb 28, 2019
- Feb 5, 2019 The life of a sheep! Feb 5, 2019
-
January 2019
- Jan 25, 2019 Lamb Liver Paté Jan 25, 2019
-
August 2018
- Aug 23, 2018 Pokeweed, Friend or Foe? Aug 23, 2018
-
July 2018
- Jul 20, 2018 Cucumbers Galore Jul 20, 2018
-
September 2016
- Sep 5, 2016 Mother Nature's Lessons Sep 5, 2016
-
August 2016
- Aug 23, 2016 Walking the Walk Aug 23, 2016
-
July 2015
- Jul 2, 2015 To Wean or not to Wean Jul 2, 2015
-
February 2015
- Feb 1, 2015 Sustainability & Our Precious Soil Feb 1, 2015
-
July 2014
- Jul 24, 2014 Squash Lasagna Jul 24, 2014
- Jul 24, 2014 Squash Squares Jul 24, 2014
-
June 2014
- Jun 2, 2014 Sustainability...What's it all about! Jun 2, 2014
-
May 2014
- May 29, 2014 What I know now.... May 29, 2014
-
April 2014
- Apr 4, 2014 Is the boss the farmer or the sheep? Apr 4, 2014
- Apr 3, 2014 Felted Chicks Apr 3, 2014
-
January 2014
- Jan 28, 2014 Lamb Ribs Jan 28, 2014
- Jan 26, 2014 DIY Wool Dryer Balls Jan 26, 2014
- Jan 15, 2014 Let the New Year Begin Jan 15, 2014
- Jan 13, 2014 DIY Heat Jan 13, 2014
-
October 2013
- Oct 30, 2013 WHOLEsome Food: EGGS Oct 30, 2013
- Oct 7, 2013 Cinnamon Pickles Oct 7, 2013
- Oct 7, 2013 Dog Biscuits Oct 7, 2013
-
September 2013
- Sep 18, 2013 Peaches, Peaches everywhere Sep 18, 2013
-
August 2013
- Aug 14, 2013 The Spider and the Butterfly Aug 14, 2013
-
July 2013
- Jul 30, 2013 They don't wear galoshes Jul 30, 2013
- Jul 21, 2013 Blackberry Lime Jam Jul 21, 2013
- Jul 11, 2013 Lamb Sliders Jul 11, 2013
- Jul 9, 2013 Our Little Orchard Jul 9, 2013
- Jul 2, 2013 The Hay Bale Fiasco Jul 2, 2013
-
May 2013
- May 17, 2013 My Secret Place May 17, 2013
- May 2, 2013 April. Did I miss it? May 2, 2013
-
March 2013
- Mar 28, 2013 Prada to Carhart Mar 28, 2013
-
February 2013
- Feb 21, 2013 Puttin Up the Fence Feb 21, 2013
- Feb 7, 2013 Lovely Cup of Chai Feb 7, 2013
- Feb 5, 2013 Looking for Llama's Feb 5, 2013
-
January 2013
- Jan 29, 2013 Winter Garden Jan 29, 2013
- Jan 24, 2013 The rams are back in their pasture Jan 24, 2013
-
September 2012
- Sep 7, 2012 Pickles! Sep 7, 2012
-
June 2012
- Jun 13, 2012 Morning Gifts Jun 13, 2012
- Jun 5, 2012 Finding the Words Jun 5, 2012
-
April 2012
- Apr 13, 2012 The girls and a few token boys! Apr 13, 2012
-
March 2012
- Mar 30, 2012 Flavor! Mar 30, 2012
-
October 2011
- Oct 9, 2011 Hay. A little three letter word that packs a PUNCH! Oct 9, 2011
-
July 2011
- Jul 22, 2011 The Glorious Tomato Jul 22, 2011
-
February 2011
- Feb 10, 2011 Shearing Day 2011 Feb 10, 2011
-
November 2010
- Nov 30, 2010 This farm gives me Goose Bumps Nov 30, 2010
-
July 2010
- Jul 23, 2010 Another aHaa Moment in Farming Jul 23, 2010
-
February 2010
- Feb 24, 2010 Farmers Wearing Lace? Feb 24, 2010
- Feb 16, 2010 Girls with no Coats Feb 16, 2010
-
January 2010
- Jan 4, 2010 Midnite on the farm Jan 4, 2010
-
April 2009
- Apr 22, 2009 Hard Day on the Farm Apr 22, 2009
- Apr 15, 2009 Lamb Meatballs Apr 15, 2009
- Apr 14, 2009 Spring Apr 14, 2009
- Apr 14, 2009 Lamb Recipes Apr 14, 2009
- Apr 13, 2009 In the Beginning Apr 13, 2009